Deploying Frame
Frame deploys several key components in your AWS account using AWS CDK (Cloud Development Kit).
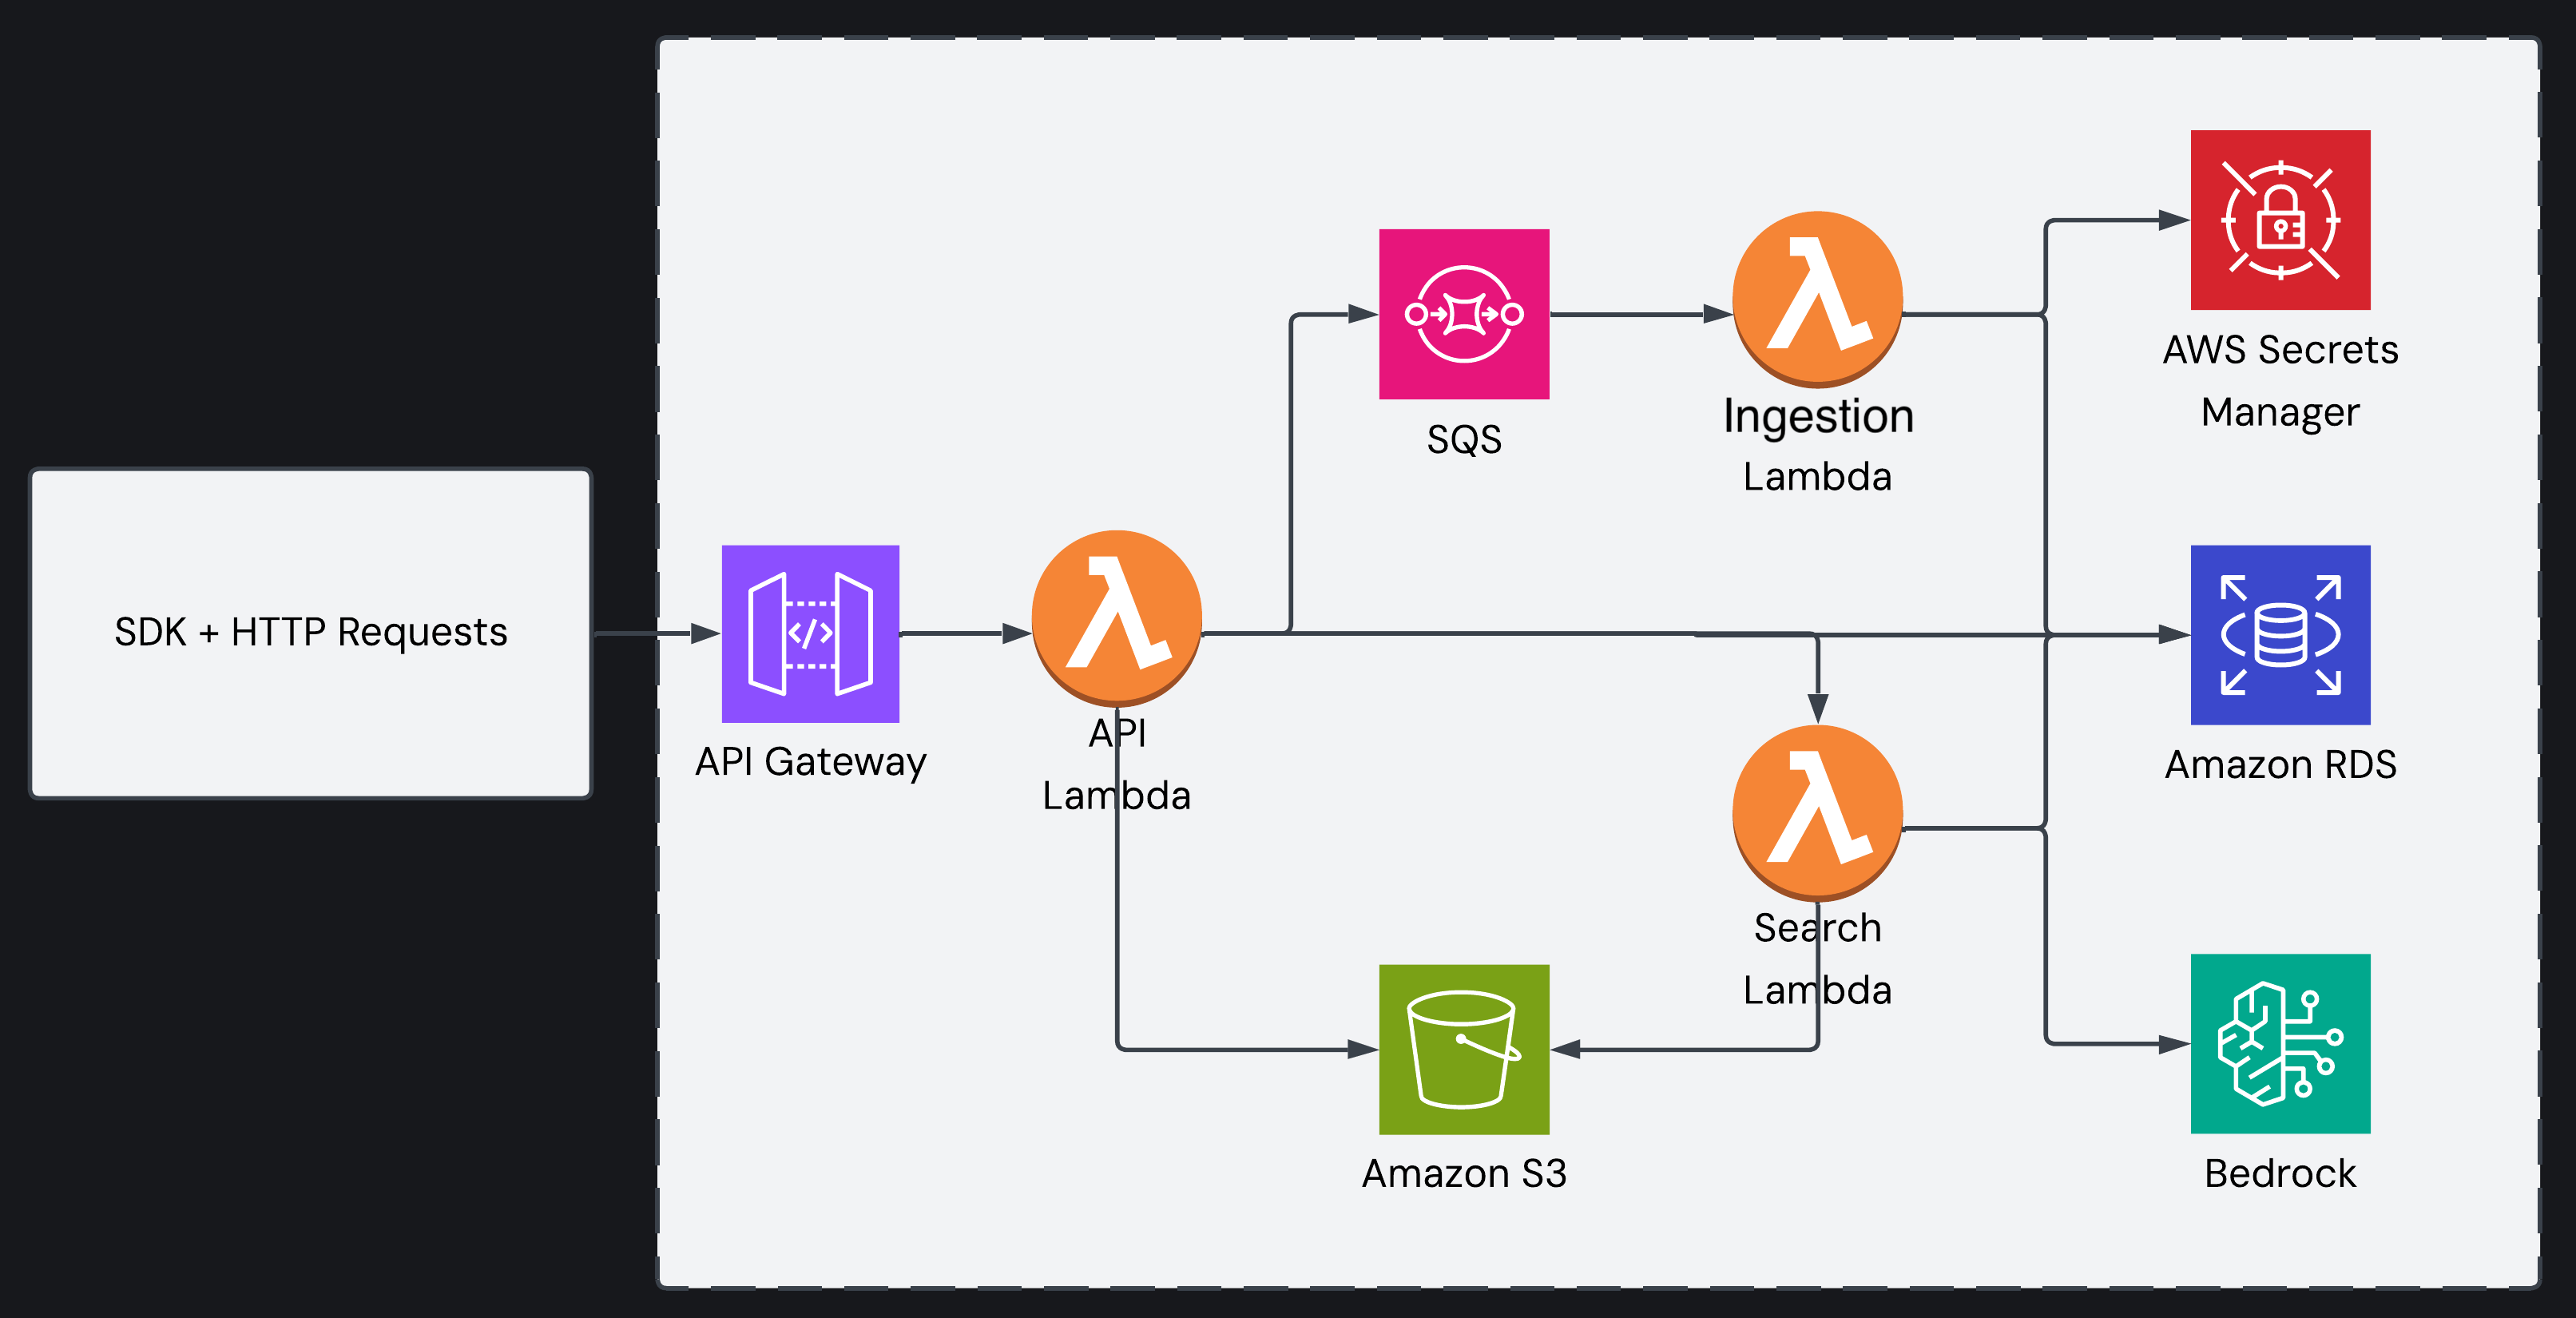
Full details of the infrastructure to be deployed for each individual stack can be found in our Github repository. Please ensure you review these documents before deploying the infrastructure.
Prerequisites
Deployment Process
Step 1: Get and Install the Code
Clone the repository and move into the top-level directory:
git clone https://github.com/Frame-Platform/Frame.gitcd FrameStep 2: Build the Project Environment
Run the below command:
npm run build:allThis will run the build-all.js script to:
- Set up the project environment by installing the required dependencies for the CLI and the CDK.
- Build the CLI by compiling the TypeScript files into JavaScript.
- Link the CLI globally on your system (to enable the use of the
document-embeddingcommands referenced below). - Build the Lambda functions referenced in the CDK (packaging them up into zip files ready for deployment).
Step 3: Configure Your Settings
Run the below command:
document-embedding initThis command will guide you through the initialization process. In particular, you will be prompted to provide the following information:
- AWS Access Key ID (can be obtained in the AWS console)
- AWS Secret Access Key (can be obtained in the AWS console)
- AWS Region
- Database Credentials (used for setup)
- PostgreSQL Username
- PostgreSQL Password
- PostgreSQL Database Name
Step 4: Deploy the Infrastructure to AWS
Run the below command to deploy Frame’s infrastructure to your AWS account:
document-embedding deployDuring the deployment:
- The CDK will create all necessary AWS resources. This process can take 10-15 minutes, so please be patient.
- Upon completion, you’ll receive confirmation of successful deployment along with important endpoints or access information for the created resources.
- In particular, you will receive confirmation of the API Gateway URL and your specific API Access Key ID details. You will need to locate the API Key associated with the API Key ID (in the AWS Management Console) in order to connect to Frame’s API endpoints via the Frame SDK client.
Step 5: Set Up The Database
Run the below command:
npm run database:setupThis creates an optimized database table for storing vector embeddings.
Step 6: Enable Amazon Bedrock Access
For the AI models to work, you need to enable Bedrock access.
Go to the Amazon Bedrock console. Details of how to enable access can be found here.
At the time of writing, the steps are:
- In the left menu, select “Model access” under “Bedrock configurations”.
- Select “Enable Specific Models”.
- Select the check box next to “Amazon Titan Multimodal Embeddings G1” model.
- Click “Next” → “Submit”.
- Wait for “Access granted” status (may take a few minutes)
Step 7: Verify the Deployment
Upload a test image using our SDK client to verify everything works correctly. See our SDK documentation for further information.
Step 8: Destroying the Infrastructure
When you no longer need the Frame image-embedding pipeline, you can remove all deployed resources with:
document-embedding destroyImportant:
- This action will permanently delete all resources created by the deployment
- All stored data, including images and embeddings, will be lost
- This operation cannot be undone, so proceed with caution
Usage
With your deployment complete, you can:
- Upload images for automatic embedding
- Search for similar images using text descriptions
- Find visually similar images
- Query, update, or delete your image data
Refer to the SDK documentation for integration with your applications.
Monitoring and Troubleshooting
Your deployment includes monitoring through AWS CloudWatch:
- Check Lambda function logs for errors
- Monitor database connections
- Track S3 storage operations
To access logs:
- Go to the AWS CloudWatch console
- Select the log group for the component you’re investigating
- Review logs for errors or performance issues